There is a specific kind of culinary magic that happens when high-heat aromatics meet the cooling, velvet embrace of coconut milk. In the world of “comfort in a bowl,” Coconut Curry Chicken stands as the undisputed champion. It is a dish that feels like a luxury—something you would order at a high-end Southeast Asian bistro—yet it can be mastered in a single pan in under 40 minutes.
Today, we are moving away from watery, one-dimensional curries. We are crafting a version that is thick, fragrant, and balanced with the “holy trinity” of curry: heat, acidity, and creaminess. Whether you are a seasoned spice-lover or a newcomer to the world of curry, this recipe is designed to be your new weeknight obsession.
The Science of the “Flavor Layering” Technique
The difference between a “good” curry and a “great” curry lies in layering. Most home cooks make the mistake of boiling their chicken in the sauce. To achieve a professional depth of flavor, we follow a specific sequence:
- The Sear (Maillard Reaction): We brown the chicken first. We aren’t cooking it through; we are creating a caramelized crust. Those brown bits left in the pan (the fond) are concentrated flavor that will dissolve into the sauce later.
- Blooming the Spices: Dry spices are fat-soluble. By tossing your curry powder and turmeric into the hot oil with the onions, you “bloom” the spices, releasing essential oils that would otherwise stay trapped if you simply stirred them into the liquid.
- The Deglaze: We use the coconut milk to lift those seared chicken bits off the bottom of the pan, integrating every ounce of flavor into the sauce.
Ingredient Spotlight: Choosing Your Elements
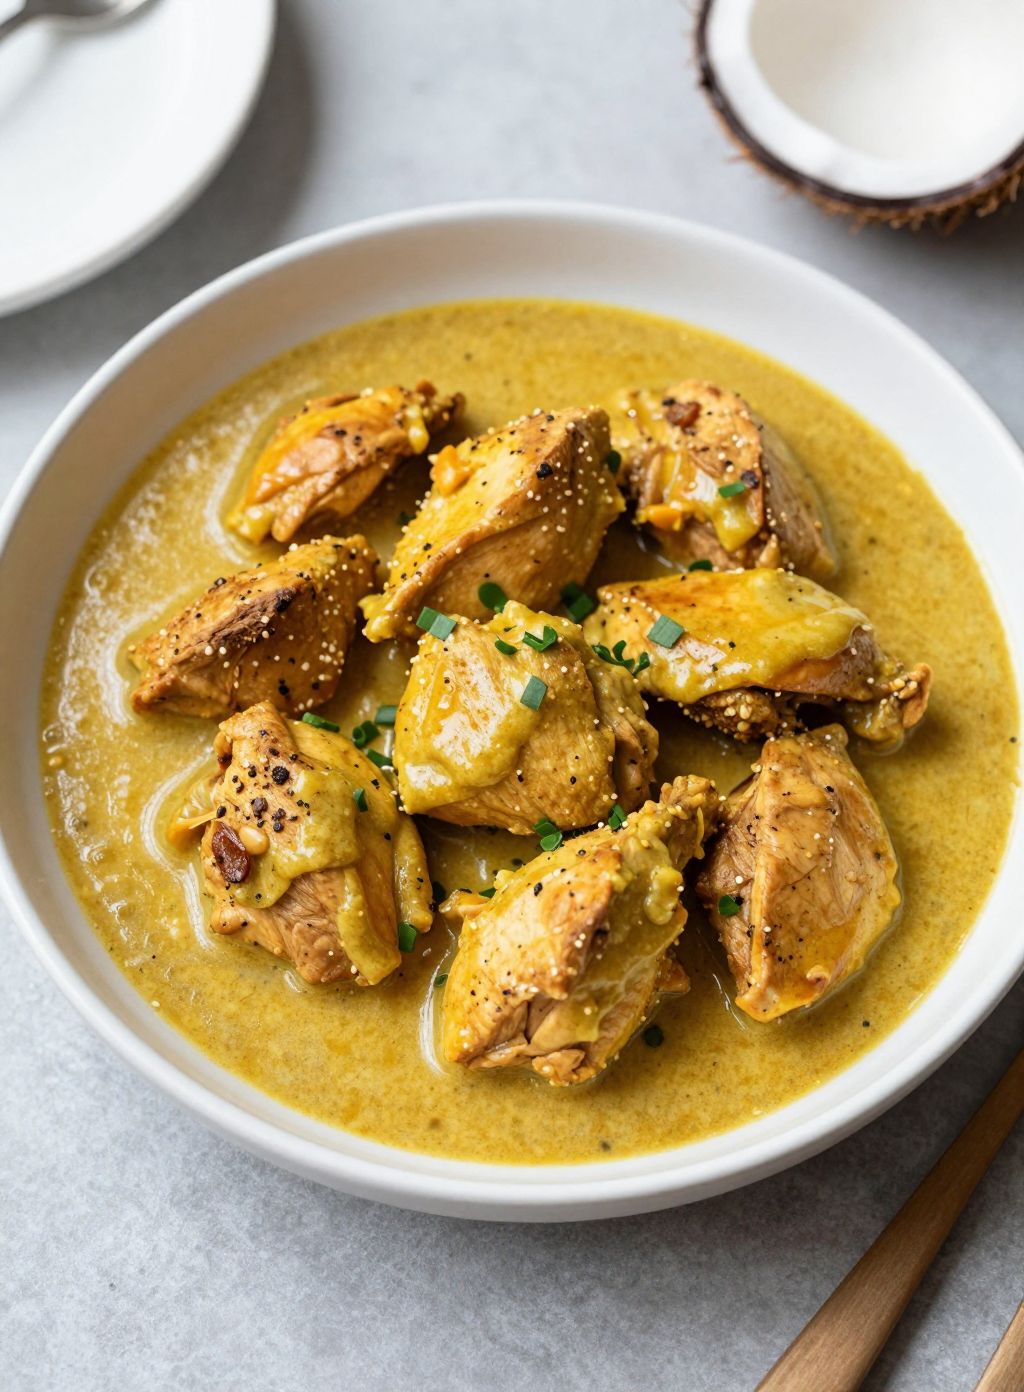
- The Coconut Milk: Always use Full-Fat Canned Coconut Milk. Low-fat versions or the “milk” found in cartons for cereal will result in a thin, grey sauce. You want the thick cream at the top of the can—that is where the silkiness lives.
- The Protein: While chicken breast works, Boneless, Skinless Chicken Thighs are the gold standard for curry. They stay tender during the simmering process, whereas breasts can become stringy.
- The Aromatics: Fresh ginger and garlic are non-negotiable. If you use the powdered versions, you lose the bright, zingy “high notes” that cut through the rich coconut fat.
📖 The Master Recipe: Creamy Coconut Curry Chicken
| Prep Time | Cook Time | Spice Level | Yields |
| 15 Mins | 25 Mins | Medium (Adjustable) | 4 Servings |
Ingredients
The Foundation
- 1.5 lbs Boneless, skinless chicken thighs, cut into 1-inch bite-sized pieces
- 1 tbsp Coconut oil (or neutral oil like Avocado)
- 1 Large yellow onion, finely diced
- 1 Red bell pepper, sliced into thin strips
- 2 Large carrots, peeled and sliced into rounds
The Aromatics & Spices
- 3 cloves Garlic, minced
- 1 tbsp Fresh ginger, grated
- 2 tbsp Yellow curry powder (mild or hot, depending on preference)
- ½ tsp Ground turmeric
- ½ tsp Red pepper flakes (optional, for heat)
The Liquid Gold
- 1 can (14 oz) Full-fat coconut milk
- 1 tbsp Tomato paste (for acidity and color)
- 1 tbsp Fish sauce (or soy sauce) for umami depth
- 1 tbsp Brown sugar (to balance the spice)
- Juice of ½ lime (added at the very end)
Step-by-Step Culinary Instructions
1. The Initial Sear
Heat the coconut oil in a large deep skillet or Dutch oven over medium-high heat. Season your chicken pieces with a pinch of salt. Add them to the pan in a single layer. Sear for 2–3 minutes until golden brown on the outside. Remove the chicken and set it aside on a plate (it will still be raw in the middle—that’s okay!).
2. Sauté the Vegetables
In the same pan, add the onion, carrots, and bell pepper. Sauté for 5 minutes until the onions are translucent. If the pan looks dry, add a tiny splash of oil.
3. Bloom the Spices
Add the garlic, ginger, tomato paste, curry powder, and turmeric. Stir constantly for 60 seconds. The kitchen should smell incredible. This “blooming” process is what prevents the curry from tasting “chalky.”
4. The Simmer
Pour in the can of coconut milk, brown sugar, and fish sauce. Stir well, scraping the bottom of the pan to release the seared chicken bits. Add the chicken (and any juices from the plate) back into the skillet.
5. Reduce and Set
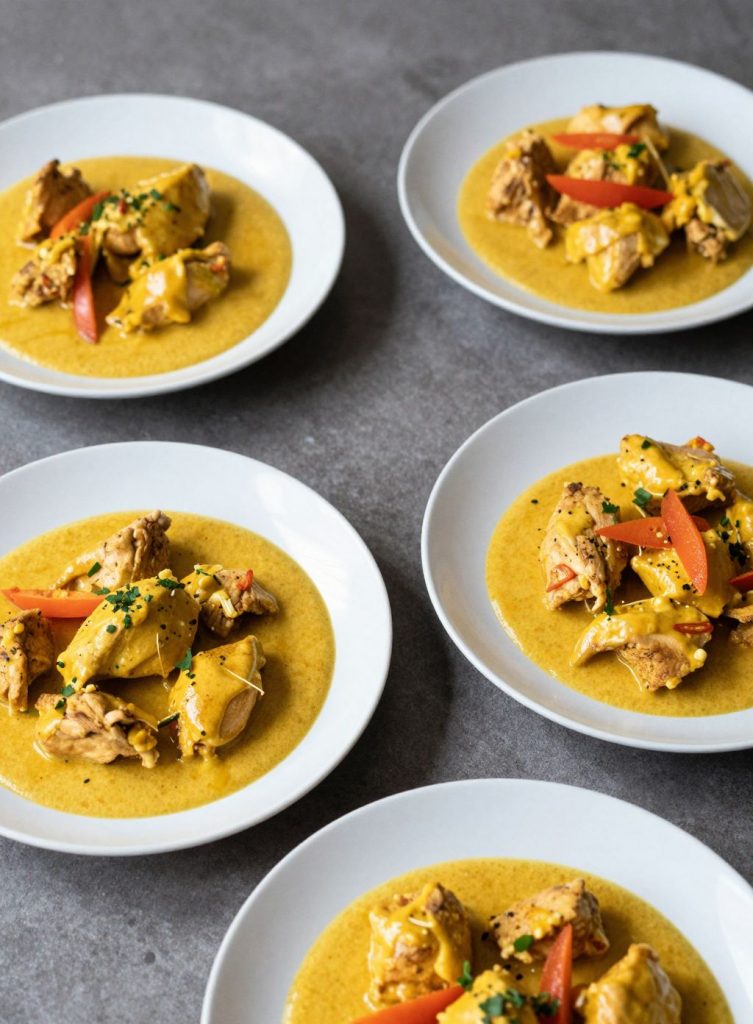
Bring the mixture to a gentle boil, then reduce the heat to low. Simmer uncovered for 12–15 minutes. The sauce will reduce and thicken into a glossy, vibrant orange blanket.
6. The Bright Finish
Remove from heat. Stir in the fresh lime juice. This “acid hit” wakes up the spices and balances the heavy coconut cream. Taste and add salt if needed.
💡 Troubleshooting & Expert Tips
- How to thicken the sauce: If you prefer an extra-thick sauce, let it simmer for an additional 5 minutes without a lid. The water will evaporate, leaving behind a concentrated cream.
- Managing the heat: If the curry is too spicy, add a teaspoon of peanut butter or an extra squeeze of lime. If it’s too mild, stir in a teaspoon of Sriracha or Thai red curry paste at the start.
- Serving Suggestions: This dish is best served over Basmati or Jasmine rice to soak up every drop of sauce. Top with fresh cilantro and a few slices of fresh red chili for a restaurant-quality presentation.
Final Thoughts: The Perfect One-Pan Dinner
Coconut Curry Chicken is proof that you don’t need a pantry full of exotic ingredients to create a complex, multi-layered meal. It is a forgiving, adaptable, and deeply nourishing recipe that turns a standard chicken dinner into a global adventure.